
User roles and permissions
Users have different access permissions based on their role. The roles are:
Viewer
Viewers can view data, view alerts, and see if someone has a DBS alert.
They cannot view the details of DBS alerts, manage users or perform support tasks.
Support officer
Support officers can edit data, view alerts, see if someone has a DBS alert and perform support tasks.
They cannot view the details of DBS alerts or manage users.
Alerts manager
Alerts managers can edit data, alerts, and DBS alert details.
They cannot manage users or perform support tasks.
Access manager
Access managers can edit data, alerts and DBS alert details, manage users and perform support tasks.
First design iteration
Navigation
We added a ‘Users’ link to the service navigation. Clicking it takes the user to a page displaying all active TRS console users alphabetically. Here, users can:
- add a new user
- search for users
- filter by role and status (active or deactivated)
- sort users
User list
We designed 2 versions of the user list to test with users.
Version 1
Version 1 displays the user’s name, email, role, and permissions with corresponding tags.
The permissions are:
- data
- alerts
- DBS alerts (users can only see if someone has an alert)
- DBS alert details (users can see the details of the alert)
- manage users
- support tasks
The tags are:
- view: read-only access to data and alerts (yellow)
- edit: can edit data, manage users, and perform support tasks (green)
- no: cannot manage users or perform support tasks (red)
Clicking the user’s name or the ‘Change’ button next to the role takes the user to a page where they can update the role.

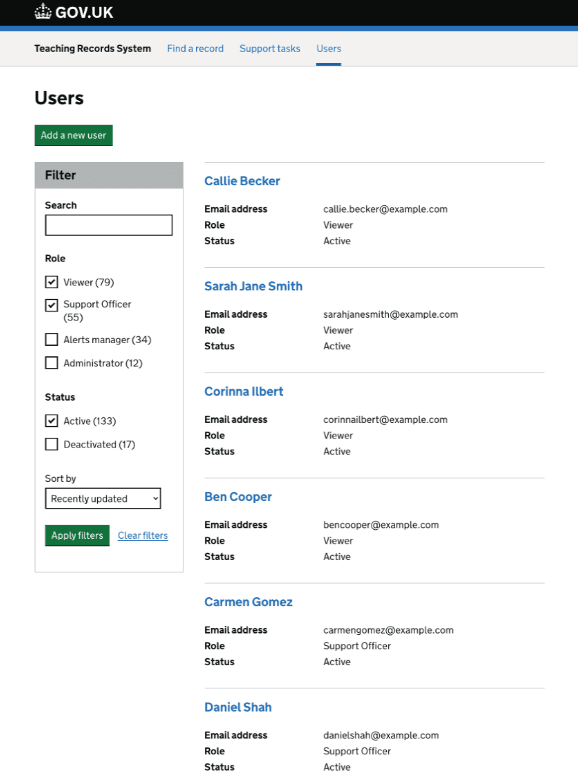
Version 2
Version 2 displays the user’s name, email, role, and status.
Clicking the user’s name takes the user to a page where they can update the role.
Adding a user
When a user clicks the ‘Add a new user’ button, they see a new page asking them to enter the new user’s email address.
Only users with an email address ending with @education.gov.uk can be added.

When the user enters an email address and clicks ‘Find user’, they see a new page where they must:
- enter the new user’s name
- select a role for the new user

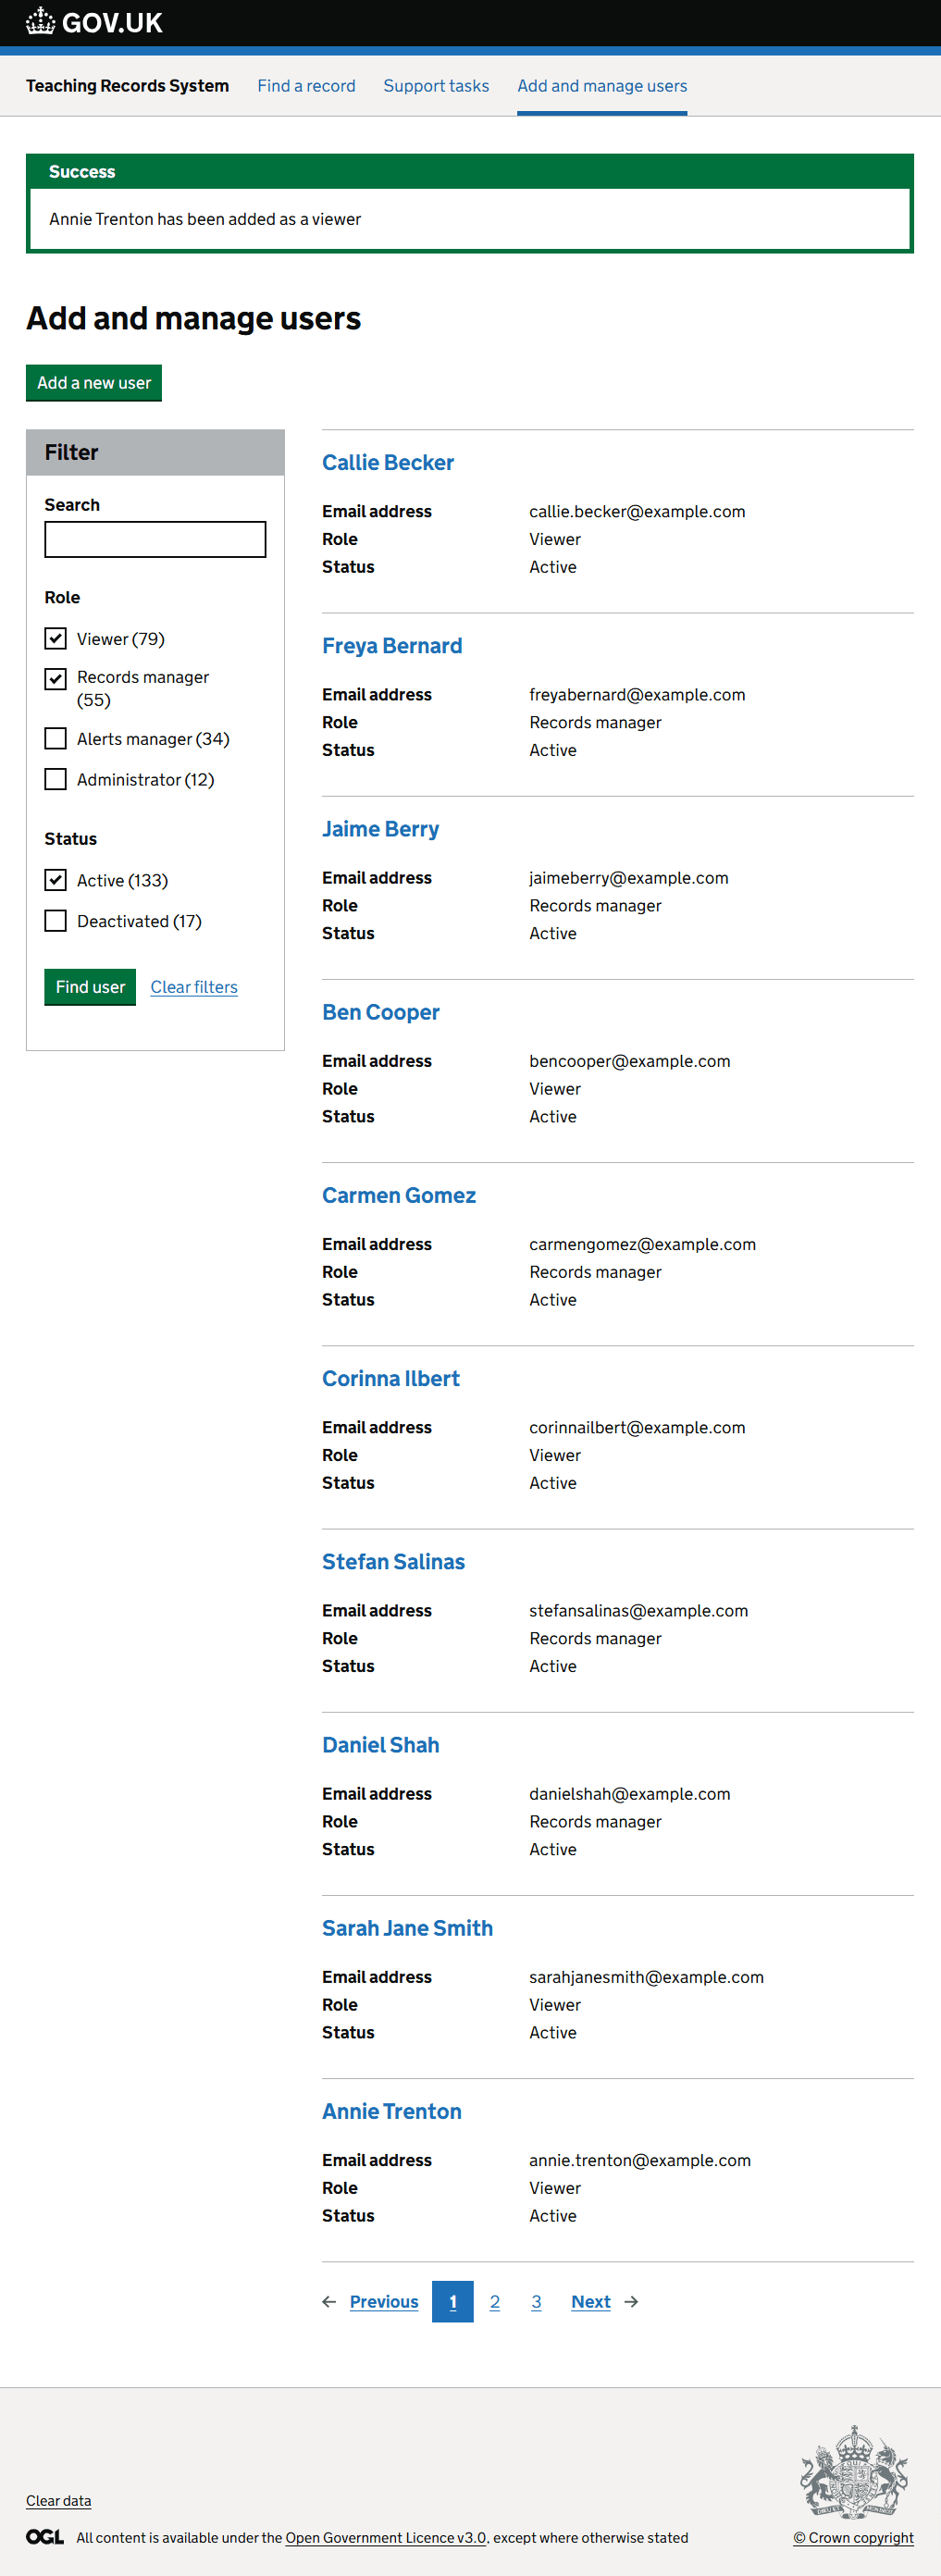
After a user selects a role and clicks ‘Continue’, they return to the user list page with a notification banner telling them they successfully added the user.
Changing a user’s role
When a user clicks on a user’s name in the user list, they see a page where they can change the user’s role.

The user’s current role is pre-selected. Selecting a different role and clicking ‘Save changes’ returns the user to the user list page. Here, they will see a notification banner telling them they successfully updated the user’s role.

Deactivating a user
On the Change a user’s role page, there is also a secondary ‘Deactivate user’ button.
Clicking it takes the user to a confirmation page asking if they’re sure they want to deactivate the account

If they click ‘Yes’, they return to the user list page and see a notification banner confirming they deactivated the account.

User testing
We tested the designs with four members of the Teacher Services operations and support team.
Navigation feedback
Some users were unsure whether to click ‘Support tasks’ or ‘Users’ in the service navigation:
“I’m thinking Users is just a list of users. You have to do something, which is why I think it’s a task.”
Users easily understood how to add a new user:
“I’d go to the 'Add a user' big green button.”
The ability to sort users was not seen as particularly useful:
“I don’t think ‘Sort by’ is as helpful as having the filter.”
Content feedback
The ‘Data’ label was unclear:
“I don't know what ‘Data’ it is referring to.”
Users found having 2 separate labels for ‘DBS alerts’ and ‘DBS alert details’ confusing:
“I'm not sure what DBS alert specifics adds beyond DBS alerts.”
The ‘Find user’ button on the Add new user page did not make sense to users:
“’Find user’ is a bit strange because the user does not exist in the console."
The ‘Support officer’ role name was unclear, with some users calling it ‘Support agent’.
User list feedback
Some users thought Version 1 of the user list was cluttered:
"There's a lot going on, there's a lot of colours. I can't really make sense of the permissions and the colours straight off. I want an easy way to find the people."
Users generally preferred Version 2:
"I really like this. It feels nice to see the role and the email. The status is a nice addition, to know whether they're active or not."
"I like that you can see the role. It looks nicer."
Second design iteration
We made the following changes based on user feedback:
Version 2 user list
We decided to take forward version 2 of the user list as users preferred its simpler design.
‘Add and manage users’ navigation link and page title
Having ‘Users’ as the navigation link and page title was seen as confusing.
We updated it to ‘Add and manage users’ to make the purpose of the page more explicit.
One DBS alerts permission
We changed ‘DBS alerts' and ‘DBS alert details’ to a single ‘DBS alerts’ permission.
Users who can view DBS alerts will see a message telling them to contact the DBS for more information.
Users who can edit DBS alerts can update the details of the DBS alert in the TRS Console.
‘Add user’ button
We updated the button text on the Add a new user page from ‘Find user’ to ‘Add user’.
‘Teaching records’ instead of ‘data’
The data permission was seen as too broad a term by users.
We changed it to ‘teaching records’ as this access type is not part of the other permissions (alerts, DBS alerts, manage users and support tasks).
‘Records manager’ instead of ‘Support officer’
This change followed the update from ‘data’ to ‘teaching records’.
This role can edit teaching records but cannot edit alerts, DBS alerts or manage users, so ‘records manager’ better reflects the role’s responsibilities.
It’s also consistent with the alerts manager and access manager role titles.
Next steps
The designs are ready for development.
We’ll monitor feedback on role titles and permissions and update them if needed to improve clarity and usability.
Prototype
Prototype with the latest designs
Password: tra